

Subscribe For Free Updates!

We'll not spam mate! We promise.

Showing posts with label Security. Show all posts

Monday, 18 July 2016

SSD Data Wiping: Sanitize or Secure Erase SSDs?


Media reports, Such As This  Computerworld article , Kingston Caused a lot of customers to be Concerned about Their procedures for Securely erasing all data from Their Kingston SSDs. Were like many articles based upon a  University of California San Diego study  revealed That Certain Processes That to wipe data from SSDs data whos left behind.

We will look at what the study says, and Provide You With step-by-step instructions to do a Secure Erase Which will wipe out all data from Kingston V Series G2, V100, V + G2, and V + 100 SSD.

Study: SSDs store data differently from hard disk drives
The Ability to totally erase data from storage devices is a critical component of secure data management, Regardless of Whether the organization is just throwing away an old system or repurposing it for someone else's use. Researchers from the Department of Computer Science and Engineering and one from the Center for Magnetic Recording and Research at the University of California found That Have Existing disk sanitization techniques originally used for hard drives do not work on SSDs Because the internal architecture of an SSD is very different from a that of a hard disk drive.

"Reliable SSD sanitization requires built-in, verifiable sanitize operations," the Researchers wrote.
Most modern SSDs Have That built-in commands instruct on-board firmware to run a sanitization standard protocol on the drive to remove all data. Since the manufacturer has "full knowledge" of the drive's design, These techniques Should be reliable, but Researchers found many of the implementations That Were flawed.

Sanitizing a storage device using ATA Secure Erase
Sanitizing is the removal of sensitive data from a system or storage device with the intent That the data can not be reconstructed by any Known technique. That for data residing on hard drives and solid state drives (SSD), a method Known as ATA Secure Erase is the MOST effective.

ATA Secure Erase is part of the ANSI ATA specification and When to Implemented Correctly, wipes The entire contents of a drive at the hardware level Instead of through software tools. Software tools over-write data on hard drives and SSDs, Often through multiple passes; over-writing The Problem with SSDs Is That Such software tools can not access all the storage areas on an SSD, leaving behind blocks of data in the service regions of the drive (examples: Bad Blocks, Wear-Leveling Blocks, etc.)

When an ATA Secure Erase (SE) command is issued against a SSD's built-in controller That properly supports it, the SSD controller resets all its storage cells as empty (releasing stored electrons) - just THUS restoring the SSD to factory default settings and write performance. When Implemented properly, SE will process all regions Including the protected storage service regions of the half.

Secure Erase is Recognized by the US National Institute for Standards and Technology (NIST), as an effective and secure way to meet legal requirements data sanitization attacks against up to laboratory level. Kingston SSDNow drives support the ATA Security Command for proper data sanitization and destruction.

Data sanitation regulations and organizational requirements
There are Numerous state and federal regulations That Contain Provisions related to the sanitization and disposal of data. For example, at least 10 states enacted laws Have That requires destruction of "personal information" when it is no longer needed for business.

The Health Insurance Portability and Accountability Act ("HIPAA") requires disposal at a formal documentation of procedures to Ensure health information is properly sanitized prior to Being discarded.

The Payment Card Industry Data Security Standard (PCI DSS) 9.10 That requirement stipulates storage media be destroyed when it is no longer needed for business or legal reasons. PCI-DSS is setup to verify That cardholder data on electronic media is rendered unrecoverable via a secure wipe program in Accordance With industry-accepted standards for secure deletion, or Otherwise physically destroying the media.

Additionally, many large private companies are now Requiring That data on all electronic storage media be sanitized prior to the media's sale, donation, transfer of ownership and disposal.

ATA Secure Erase tools
A DOS shareware tool called HDDErase can be used to execute a Secure Erase. HDDErase is available here.

HDDErase is an easy-to-use tool That runs from a DOS bootable drive. In order to run the system BIOS must be HDDErase Set to "IDE" or "Compatibility" mode in order for the drive to be Recognized by HDDErase. HDDErase can only be run on systems That drives are attached to a SATA or IDE ports Directly and not through a USB bridge or enclosure.

Running HDDErase
To execute a HDDErase using Secure Erase, boot from a DOS bootable drive Containing HDDErase and type hdderase, at the command prompt.
Next, HDDErase will confirm you want to run this program, select "and" to proceed. This step will be followed by additional disclaimers and a license agreement. Follow the on-screen instructions.
Next, HDDErase That will confirm all data will be "Deleted" from the selected drive. Select "and" to proceed.
 
Next, select the drive to be erased. In This example P0 Should be selected.

Next, select "1" to execute a Secure Erase.
Confirm by selecting 'c' to continue
 
When Secure Erase has finished a message will Appear That Secure Erase is complete.
Just enter N and exit.

The web site has detailed documentation on This utility.
Proper Sanitation of Kingston SSDs: Secure Erase Use Only
Secure Erase using a utility That properly implements the ATA Secure Erase command is the best way to Effectively wipe all data from a Kingston SSD.
One key benefit for IT - Secure Erasing an SSD no longer requires the 6 or more hours required for a multi-pass wipe hard drive. On a 256GB Kingston SSDNow V + 100, to Secure Erase can be completed in 2 minutes. Some SSDs can take longer, but not nearly as long as mechanical hard drives!

View the entire Kingston SSD product line

Author: Cameron Crandall - Kingston Technology

Thursday, 5 May 2016

Best SSD for Gaming, Graphics Editing and Office Use


SSD or the Solid State Drive is a buzz word since day one and even after years after the first one surfaced up its still a dilemma for many when it comes to finding or even deciding which one is the best for them. While you're already aware of the fact what a SSD actually is or else you won't be reading this article in the first place I'll still go on a state a few lines about it for the one's who are new to this. A SSD is nothing more than an electric storage device in contrast to the conventional mechanical storage device ie a HDD. This not only makes a SSD more reliable due to absence of moving parts but also makes it a device way superior in terms of raw speed when compared to its older cousin, system boot time reduces to fraction of seconds, games load at blistering fast speed and you can move data faster than ever before.
So the big question is which one is the right one for you? Today we'll be answering this question by compiling a list of the best SSD for the price. Our list is based on the following key points --
1. SSD comes in various sizes so we'll be naming the one's that have the best price to performance ratio in all genres.
2. Performance, stability and sustainability are a major factor since SSD comes with  life expectancy.
3. Public opinion and user review have also been taken into account along with personal reviews.
4. Its about SATA SSDs today NVMe and M.2 we'll be covering up in a list later on.

Best Over All Performer -- Samsung 850 EVO


This one isn't a surprise since the Samsung 850 EVO is undoubtedly one of the most popular and most trusted SSD ever *period* Coming in 120GB, 250GB, 500GB, 1TB, and 2TB  capacities not only does it offer a wide range of choices but also has been able to price them really competitively in contrast to others while offering much superior performance. The simple reason behind this unparalleled price to performance ratio is that Samsung is amongst the very few manufacturer's who build & design a SSD ground up, they design the controller, programs the firmware, manufactures the NAND flash memory, and sell the finished product all by themselves.
Though low capacity models are a bit slower but the entire high capacity range maintains a near 500MB/s read/write speed under synthetic and real-life benchmarks so its a complete package of price, performance and reliability. On the down side under heavy loads the speeds can drop upto as low as 120MB/s

Best Budget SSD -- SanDisk SSD PLUS


Okay this one might be a little hard to swallow but this is a fact that the SanDisk SSD PLUS is the best budget SSD in the market today and the closest competition is identically priced but way slower in terms of performance. A budget SSD directly translates to the fact that it should be as cheap as possible and deliver a decent read/write speed along with a high GB/dollar ratio.
Though the SSD is available in 120GB, 256GB and 480GB capacities the lower capacity one tends to be the faster one.

With around 490Mb/s of read speed and 430MB/s of write speed makes it a great drive for work that requires faster load time or in short daily usage like gaming, video playback etc.

Best Premium SSD -- Samsung 850 Pro


Well this list may sound biased since Samsung has grabbed two out of the three spots but fact is a fact that the Samsung 850 Pro is an undisputed champion of SATA SSDs. The 850 Pro uses a triple core MEX controller running at 400MHz, which is a step up from the 850 Evo’s dual-core MGX controller and also the best in class.
All this comes at a price and I really don't advice anyone to buy a SATA SSD this expensive since you can get M.2 and NVMe SSDs at much lower prices but if you are one of those who are on a shortage of PCIe lanes due to massive graphics card or a PCH limitation then this is your only option to overcome any storage bottleneck.

Read and write speeds are solid and locked at near 500MB/s even under prolonged load which is a rarity in any SSD. The ten-year warranty supplied with the 850 Pro is a sweetener as the drive is rated for 150TB of writes, that equates to 80GB per day for five years, or 40GB a day for ten years, which is certainly enough for workstation use.

Well that concludes our brief journey through the various SSDs and I hope this will help in easing up your decision on to which SSD to put your finger upon. It'll be worthy to mention some SSDs that didn't make it to the list such as the Intel Series 730 which are really good & reliable but is just a tad too expensive and the same goes for the Kingston Savage which is a complete package no doubt and a better choice if you are building a show-case system clearly because of its looks.
So if you have any other suggestions to add to this list then do drop it in the comments below and we'll definitely add them if its good and as always any query regarding the same is welcome.

Friday, 23 October 2015

ADATA HD720 1TB External Hard Disk Review and Specifications


We've been receiving quite a lot of hardware from ADATA guys these days ranging from really fast SSDs like the Premier Pro SP920SS to the edgy XPG 2400Mhz DDR4 RAM kit. But today we have the successor to the more familiar and much appreciated external hard drive HD710A, we have with us the ADATA HD720 1TB External Hard Drive for review .
Pretty much like the HD710A the newer HD720 is rugged and build to last, the various standards that it meets will be covered later on n this review but for now lets take a quick peek into the specification sheet.

Two things from here are quite clear, firstly, the HD720 looks different from its predecessor and the change is surely a welcome one. Secondly, the performance of the drive will be the decisive factor for those looking for an upgrade from the HD710A to the HD720 since rest of the things seems just identical.

Packing and Closer Look

The Pack

The ADATA HD720 1TB External Hard Disk comes in a simple white packing which is now customary to all the ADATA products, the front is accentuated by the ADATA Logo on the top left and the product name and form factor details on the right. The Hard Disk can be clearly seen resting inside the box via the see through panel in the middle which occupies most of the front and hence is a good thing.

There isn't much fuss involved and ADATA has listed all the specifications and awards that the HD720 meets right in the front so as to keep it all straight forward for the customer. More companies should follow such practices and I give an extra point to ADATA for their packing!

Inside you get the HD720 itself resting safely in a molded plastic frame with the connector cable wrapped onto it like an accessory. The cable is quite short for connecting it to a desktop and only laptop users will find it fitting, topping it up you can't use your own cable with this drive so you are stuck for good! A nifty little manual also comes along which I feel is quite a prehistoric practice at this moment of time. All in all everything is simple and sophisticated.

Closer Look


The HD720 complies with strict IEC/EN 60529 IP68 specifications and requirements. This means the unit offers complete dust tight protection for stable and long-lasting operation in particulate-infused environments. Its because of all this that I may quote, its a drive for those who literally want to throw their disk in a puddle of mud!
Certification also means the HD720 is rated for up to 120 minutes of submersion in water at a depth of up to 2m. Hence even a drop into a body of water will not disrupt a cherished trip or a vital work task. ADATA has also designed the HD720 to surpass the already-tough MIL-STD-810G 516.6 drop test: the drive can easily survive sudden and violent crashes and drops from as high as 1.8m, whereas the standard sets a 1.2m drop height.

ADATA says that the HD720 comes in three layer protection which is quite evident from the looks themselves. The first custom-weaved flexible silicone layer is actually dust proof so not even a single spec of dust will pass through that, through the hexagonal shapes we can see the second plastic layer oozing out which is responsible for making this unit waterproof. I'm a big fan of rusty, rugged stuff so I'm game for this particular drive!

At the bottom you find the connection port for the drive tucked in nicely behind a silicon flap and if dug deep you'll find a meshed LED light just above it. The HD720 comes equipped with a G Shock Sensor. So in case the drive suffers a severe shock from being struck, G Shock Sensor Protection automatically starts up and displays a flashing red light. When the shock has passed, a solid or flashing blue light displays indicating normal operation has resumed.

Test Setup and Benchmarks

Before I get on with the benchmarking I would once again like to point out that the USB 3.0 cable provided along with the product is atrociously short! I couldn't plug in the drive to the front USB ports on the PC case and let it rest on the table so in the end kept it on top of the case itself. Laptop users might not find the cable length awkward though, maybe ADATA thinks only laptop users roam around much and need durable drives *wink*


Note: Since its not just another drive so I tested the HD720 by submerging it under water for around 30 mins and then letting it go from a height of 1m. The drive worked flawlessly and the results of the test can be found below!

The test bench was as follows:
CPU: Intel Core i7 5960X (OC at 4.5 GHz)
Motherboard: GIGABYTE X99 Gaming 5P
RAMs: Corsair Vengeance LPX 2800Mhz 16GB DDR4 (4x4)
CPU Cooler: Corsair H110 CPU Liquid Cooler
Graphics card: Asus STRIX Radeon R9 390X 8GB DDR5
Storage Drive: Corsair Neutron GTX 480GB SSD
Power Supply: Corsair AX860i 860W 80+ Platinum
OS: Windows 8.1 Pro 64-bit
Driver: AMD Catalyst v15.7.1

ATTO Disk Benchmark

Starting up we have the very famous and very easy to use benchmarking tool, the ATTO Disk Benchmark. In our traditional way we have selected the transfer size to range from 0.5KB to 8192KB, and have set the total length of the test to be 256MB.

In the test we can see that the ADATA HD720 scores a maximum read speed of 115MB/sec and 113MB/sec as the maximum write speed.

Crystal Disk Mark v 5.0.2 x64

CrystalDiskMark is a disk benchmark software that analyses different types of hard drive and determines the read and write speed of the disk based on compressible data and random data that mainly consists of incompressible files.

The scores are nearly identical to that obtained in ATTO with 116MB/sec and 113MB/sec as read and write speeds respectively.

AS SSD

Though the name suggests its only for SSDs but it works equally well for HDD and since it uses incompressible data for its measures so in our case where we are using a HDD lower speeds will be expected. Also I've included the IOPS (Input / Output Operations Per Second) in the second image.

The test hammers a drive and he ADATA HD720 passes with flying colors at 110MB/sec and 109MB/sec read and write speed respectively.

Anvil Storage Utilities Professional

Anvil Storage Utilities is essentially an all-in-one tool for all of your SSD benchmarking needs. Anvil can be used for basic consumer testing, as well as endurance testing and threaded I/O read, write and mixed tests. It displays data regarding the SSD, and even about your system

Alright so the same story is repeating over and over again, the ADATA HD720 is producing the same results in almost all the tests which projects its consistent and durable behavior. The speed measured here are 111MB/sec both in read and write processes.

HD Tune Pro 5.60 (Trial Version)

HD Tune Pro is my last test for the HD720 since I'm seeing consistent results on the drive one after another, its a great utility not only for benchmarking purpose but also helps to check the drive health which is very important at the end of conducting tests of any kind.

As we can see that the drive is in perfect condition and functioning properly  with a read speed of 114.5MB/sec and an average of 90.7MB/sec which is yet another fantastic score!

My Verdict

ADATA has always been famous for delivering what they promise and many a times its more than what they promise. The HD720 is no exception, it is a great product that passed all the synthetic and even physical benchmarks with flying colors and never did it once let me feel disappointed.

The ADATA HD720 is head and shoulders above the competition when it comes to durability and performs equally in terms of data read/write speeds. Be it a professional outdoor photographer or a businessman who loves his vital data or even a simple guy who doesn't want to lose upon his precious movie collection at the hands of an over excited kid at home -- the HD720 is the drive you need to have. Priced at just $69 or Rs 5000 in India the ADATA HD720 is the drive to go and I highly recommend it to anyone and everyone out there who cares for his precious data & doesn't want to compromise upon added features or transfer speeds.
I give it 9/10

Thursday, 8 October 2015

What is TRIM in SSD and how is it useful? How to use TRIM?


Solid State Drive or SSD is getting more and more common by every passing day. Though they are not a worthy substitute to the traditional Hard Disk Drives or HDD due to their high price tags and limited storage sizes.
But since its a developing field they have evolved from the traditional SATA to M.2 and now even into NVMe based speed giants. Since new technologies are accompanied with new terms, the same tradition continues in the story of the SSDs. TRIM is one such buzz word and something that has got many confused rather than excited!
So lets move ahead and clear out this 'TRIM' problem that many of you out there must be dealing with...

What exactly is this TRIM?

Before I explain to what it is and how it works let's give you a quick peek into how a SSD works in the first place. Keeping it simple all the data on a SSD is actually stored on the flash memory chips that you can find on their PCB and these are maintained and mapped by a cache memory in turn. These flash memory chips store your data in data blocks which are further bifurcated into pages. Imagine it like this, SSD is a big library that has multiple shelves containing books of all types.

Library = SSD
Shelves = Data Block
Books = Pages in that Data Block

So now you need to get rid of some old books and you mark them for replacement at the month end. But you are clumsy and unload the entire shelf on the floor and then search for those books that need to be replaced. Finally you find them and swap them with new books and start putting back the entire set of books back on the shelf in a very slow and cumbersome way! This really sounds odd and inefficient but don't be shocked as this is how the SSD works!
When you delete any file from your system the SSD marks that data stored on a particular page of a particular data block as "free" showing you free space on the drive but doesn't delete the data in reality. This keeps happening till the time you don't copy-paste or create a new file which needs to occupy that "free" page. At this moment the SSD picks up the entire data block along with those "free" pages and copies them onto the buffer chip which then deletes or swaps the "free" pages with new data or pages.
This not only doubles the tasks and consumes time reducing your read & write speed drastically but also causes the wear of flash memory chips over time and brings down the life span of the drive manifold.

But all is not lost since this is where TRIM jumps in to save the day. TRIM command informs the OS not only about the address of the page but also deletes the data clean off of it at that particular moment itself. So when you write new data the SSD stores it directly onto that free page and saves time by a great extent giving you fast read/write speed along with stable and long term performance.

How can I use it?

To use the TRIM command you need to make sure of two and two points only:
1. Your OS supports TRIM. For example Microsoft Windows 7 and above are TRIM enabled
2. Your SSD needs to be compatible with TRIM. Head to the manufacturer's website and check it.

To enable TRIM or to see if its already enabled or not follow the below steps --

1. Click on Start Menu and type 'cmd' without quotation marks and select the cmd program that appears.

2. Type the following and see what is the displayed result.

  • There are only two possible outcomes:
× DisableDeleteNotify = 0 : TRIM is already enabled and working in Windows, so sit back and relax
× DisableDeleteNotify = 1 :  TRIM is not enabled → Proceed to step 3 to enable it

3. To enable SSD TRIM support in Windows, type the following at command prompt and press enter:
fsutil behavior set DisableDeleteNotify 0

So this is all that I had to share with you guys on TRIM and I hope that this article managed to clear your doubts regarding this new technology. Do drop a comment if you have any queries or want to add  anything to this article.

Saturday, 7 March 2015

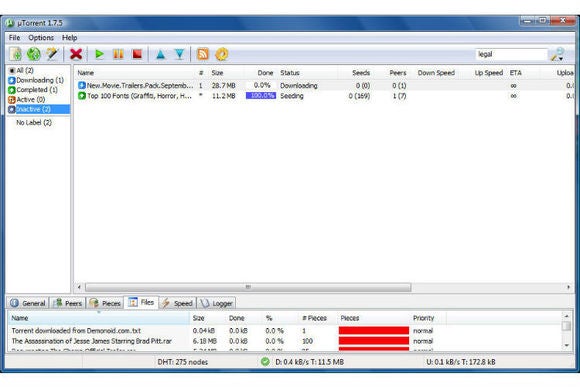
uTorrent quitely installs Bitcoin Mining software on user's computers

The popular BitTorrent client uTorrent is facing a backlash after trying to turn a buck through cryptocurrency mining.


On Thursday, users started reporting that uTorrent had silently installed cryptocurrency software from Epic Scale as part of version 3.4.2 build 28913. Once installed, Epic Scale uses some of the computer's spare processing power to generate cryptocurrency (such as Bitcoin or Litecoin).

In response to user complaints, a uTorrent manager confirmed parent company BitTorrent's partnership with Epic Scale, saying the software generates revenue for uTorrent while also contributing some funds to charity. “In the future, Epic Scale plans to contribute CPU cycles to other initiatives, such as Genome mapping and other academic studies that require a great deal of processing power.”

However, the manager denied that EpicScale was installing without the user's permission, claiming that uTorrent could not reproduce the issue. That's despite complaints from five users on uTorrent's forums who say the software was installed automatically in the latest update.

In any event, users can partially uninstall EpicScale through the Add/Remove Programs menu in Windows. A registry modification will remain in the ProgramData/Epicscale folder, though users can safely delete this folder once the uninstall is complete. That hasn't stopped dozens of outraged users from swearing off uTorrent in favor of alternatives such as qBittorrent, Deluge, and Transmission.

Why this matters: Cryptocurrency mining burns more than just spare system resources. By making the CPU work harder than it normally would, it also consumes more energy, potentially raising users' electricity bills. While it's ironic that users are aghast at an act of leeching from a program that facilitates media piracy, that doesn't let uTorrent off the hook for a lack of transparency. Some quick backtracking seems likely.

Tuesday, 3 March 2015

Is it necessary to eject a USB Flash Drive?

As insignificant as it may look but this is a questions that most of you don't know an answer to and even if you do you don't have reason to back it up.

Either-ways be it the question of Is it necessary to eject a USB from Mac, Linux or even Windows the answer is all the same, Yes! It sis important to safely remove a USB Flash Drive.
Why? The answer is simple, Write Caching.
When you transfer data to a Pen Drive or a portable HDD cache writing is enabled all the time keeping data in the cache memory waiting for the execution process to finish up. So when you click "eject" or "safely remove hardware" a message is sent to the cache that the process is to be terminated.
Fortunately Windows is aware of this laziness and from Windows 7 and above has enabled the "Quick Removal" option by default. To check if its enabled in your OS of not just right click on the USB drive icon in my computers and select Properties>Hardware>Properties>Policies and see if Quick Removal is selected or not.
But beware for portable HDD its not enabled and manual ejection of the USB flash drive is necessary in such cases. Obviously you don't want to throw away your GBs ot TBs of important data into the trash bin just because you didn't eject the drive.
The more cautious among us, who would describe frightening stories of damaged cells, will say that you should always, always safely remove any kind of USB drive. My technical advice: Live a little. When it comes to smaller USB drives, I don't bother. It's not like I'm transferring top secret files of which there's only one copy. The worst that might happen is that I corrupt some data and transfer it again, or have to reformat the drive. Not too scary, and if your flash drive ever dies, it probably wasn't because you didn't click "safely remove hardware" every time. Exposure to heat, physical damage, and wear from writing data and plugging/unplugging (USB plugs only last for so long) are far more likely to hurt it. Keep your big external drives safe by safely ejecting them, but there's no need to be nervous about removing a USB stick as long as you've let any transfers complete.

Sunday, 1 March 2015

How to remove Superfish from your Lenovo Desktop or Laptop

In mid February of 2015 the news broke out that Lenovo, a global leader in notebook manufacturer, had mistakenly shipped all its desktops and laptops between the months of September and December with an ad-ware called Superfish. Well, if that's not troubling enough then hear what it does.
Superfish uses a man-in-the-middle certificate to insert ads into Web browsers. But it also opens the door to third-party access of a user's browser data, according to security researchers. Which means all your passwords be it a social site account password or a shopping site's credit card password all are at risk!
Now Lenovo is has ceased the installation of Superfish in all its products but for those who purchased a Lenovo laptop or desktop in this period or have purchased one recently it's a worthy protocol that you inspect and clean tour machine for any traces of this as-ware as it is "non-detectable" by any anti-virus!
Note: Lenovo released an automated tool that will remove the software and certificate. You can find that here. Manual uninstall instructions are below.

Still for those who don't have a net connection to download the tool, mainly in rural areas where the internet connectivity is very thin, I'm giving the manual steps below. Just follw them and you'll be all good.

Removing Superfish ad-ware

1. Open "search" in Windows 8.1

2. Without the quotations type "remove programs" and select Add or remove programs.

3. Now in the list of all the programs that appear search for the name "Superfish Inc. Visual Discovery" if it is not there then you don't have the program on your system and you can skip the next step and jump to the next section of this article.

4. If you see this program then it is there, simple select Uninstall and you'll get rid of the Superfish ad-ware.

Removing the Superfish Certificates

According to Lenovo, the certificate might still exist even if you delete the application, so you need to delete both manually.
1. Again open "search" on Windows 8.1
2. Search for "Certificate" and select "Manage computer certificates."


3. The pop that appears will have options of Yes and No, simply select Yes.
4. Another window will appear. On the left, look for "Trusted Root Certificate Authorities." Click that and then select the "Certificates" sub-folder. In the list that appears on the right, find "Superfish, Inc." (If it's not there, you don't have the Superfish certificate installed.)

5. Right-Click and select delete on the Superfish Inc. directory and confirm the delete.

6. Restart your PC 

There, you are all done and good to go.

Wednesday, 28 January 2015

Troubleshooting WiFi Connection Problems


Wi-Fi is the most wonderful home convenience—except for when it isn’t. That’s why it’s a good idea to have a mental checklist on hand for common issues that might be causing the problem when your Wi-Fi checks out.
Everybody has their own favorite way of handling Wi-Fi problems, but here’s mine.


Reboot: The Basic Solution


The simplest reason is often the most likely cause of problems. If your router’s lights are not displayed in the usual order, turn off your router, wait five to fifteen seconds, and turn it back on again.  
This is also a good time to ensure that all your cables are connected correctly. As an alternative to simply switching the router on and off, first try disconnecting it from the power source. Now take out the cord that feeds into your router from the wall to deliver your Internet connection, such as a TV cable, ethernet cable, or telephone cord. Wait a few seconds and power the router on. Then wait another five seconds or so before connecting the Internet cable to your router again.  

Its Hot!


During this time you should also check to see if your router feels particularly hot. If it does, your router might have an overheating problem. Check to see that your router isn’t up against an obstruction that could be blocking its vents.
Maybe you placed it on another piece of tech that also heats up, or perhaps the router’s on a rug where it can’t properly cool down. Routers, like PCs and gaming consoles, are complicated electronics that need room to breathe.


Signal Drops


If your connection starts dropping only in a part of the house where the signal once came through loud and clear, there are a few things you can check. First, if your router has physical antennas make sure they are pointing straight up for the best possible coverage area.
If your router is near a possible obstruction like a metal filing cabinet, move the router to another part of the room or try elevating it a bit more.
Finally, you might try changing your router’s channel as other routers around you may be muscling in on your home network’s signal.

Lights and everything is good----Still not working


Your router’s lights show everything is working properly, but you can’t see your Wi-Fi connection listed on your laptop or smartphone. What gives?
Did you rename your router to something more personal like NoFreeloading? If so, your hardware may have been reset without you realizing it. This can happen due to a random anomaly, a firmware bug, curious children, or even your ISP.
Look at the bottom or the back of your router for a sticker with its original name—called the “service set identifier” (SSID)—such as LINKSYS WRTXYZ. Don’t forget to note the original password that’s also on the sticker.
Now check the Wi-Fi connections listed on your device. Is your router’s original name there? If you see it, connect with your original password. If that works, then login in to the admin panel and then change your router’s name back to whatever snappy title it had before. Just don’t forget to change the default password as well.
More security minded folks may prefer to use a PC to connect to their router directly with a cable and reset the name from there. It’s entirely possible that you’re router is not the only one named NETGEAR in the vicinity.

Reset: Yeah its scary

If all else fails, you may have to reset your router to its default settings. This should always be the last resort since resetting a router can have unintended consequences. Some connections, for example, may need to be reset on your service provider’s end—requiring a call to your ISP. Resetting your router will also wipe out any personalized settings you had, such as your SSID, control panel password, and network connection password.
Look for a button on the back or underside of your router. Typically these are small holes that contain a button within that requires a paper clip or some other small instrument to press. Once you’ve hit the reset button, wait a few seconds before releasing it and see if that fixes your problem.
If all else fails, you may have a hardware failure on your hands.

Wednesday, 14 January 2015

How to Clone a Hard Disk Drive (HDD) or Solid State Drive (SSD)

So you've just got yourself a shiny new SSD to replace your HDD as storage for your OS for fater booting aswell as faster execution of any application. Or you might have well got a new HDD/SSD to replace your old dusty storage drive.
But the big problem is of reinstalling the whole Windows and all the applications including your work softwares to your big game setups that resided peacefully in your by  default "C:" partition. Its obviously very tedious to do all that again but wait I'm here to solve this problem and save your precious time so that you can simply plug and play your new hardware.

The easiest solution to this is to Clone your primary hard disk and that also your system partition onto your new drive before starting to use it. Cloning copies the complete contents of one drive—the files, the partition tables and the master boot record—to another: a simple, direct duplicate. Imaging copies all of that to a single, very large file on another drive. Simply speaking your computer will feel as if its the same old drive even tough its the new and faster drive that you just bought.
For cloning we need to have a third party software to aid us in this process, there are plenty of them out there and most of them are free and most reliable as-well. Today I'll use Macrium Reflect as its compatible with all the brand's drive regardless of the company or type.
Note: Before you attempt to clone your hard drive or SSD, we highly recommend backing up all your data first. In addition, make sure the drive you are cloning to has enough storage space to take all the cloned data. For instance, you wouldn't want to try and clone a 2TB HDD on to a 256GB SSD now would you?


Step1: Plug it in

Before we do anything you need to plug your new HDD or SSD into your PC either via the USB port if you have the adapter and cable or you can connect it simply as a slave disk along with your existing drive through the SATA connector. 

Now boot up your system and proceed to the next step.

Step2: Download and install Macrium Reflect

Macrium Reflect is available here
Download and install the software on your system.


Step3: Important and Sensitive

Open up the software and click on Clone this disk…after this you'll see the option of choosing the source drive and the destination drive, the source drive is the drive that you want to clone preferably the windows partition and the destination drive will be your new drive that you plugged in. Make sure that you choose both the drives correctly and cross check it once selected as you might end up copying the wrong partition or in worst case a blank drive onto the system partition!
Once you have double checked that you have selected the correct destination disk, click “Copy selected partitions.” Macrium will ask if you wish to perform a “forensic” or “intelligent” sector copy. “Forensic” will copy every single bit on the hard disk, regardless of whether or not it’s actually in a used sector. “Intelligent” will only copy the disk sectors actually in use. We recommend you select the intelligent sector copy and tick “Verify File System.”

Click OK and you'll see the drive being cloned and that's it. It will take time depending on how much data you are cloning, ranging from minutes to  hours. So go around and make yourself a cup of coffee in the mean time.

Step4: Finishing touches

When you’re done, there’s one thing you’ll likely notice immediately: the partition copied in a 1-to-1 ratio to the new disk which means if you’re upgrading from a 120GB SSD to a 512GB SSD there will be a whole lot of unused space. Don’t worry, we can fix that easily enough. Simply click on the “Cloned Partition Properties” beneath your freshly cloned disk.

There you can click the “Maximum Size” button to automatically resize the existing partition to utilize the full amount of available disk space.

Much better! We didn’t spend all that money upgrading to a nice spacious SSD to leave the partition unexpanded. At this point, with your disk cloned and your partition expanded, it’s time to test out the new drive.

Step5: Reboot

After the cloning process is over just restart your PC and press F8 on your BIOS screen to enter the boot menu and change the boot priority to the new HDD or SSD that you've just cloned all your data to. This will make it your primary drive for booting up and make the old storage as a slave drive.
Now when the Windows boot up simply you can go to My Computer and see that all your files are copied and working from the new storage, now you are free to format the old partition on your old disk and free up that space.


Well that was all I guess you got your data cloned and your system running at a much faster pace than before and yes you definitely saved up a lot of time and hassle.
If you have any query regarding the same or want to add something to the article feel free to drop a comment.